CHOOSING PAINT COLORS - PART THREE - EVALUATING THE LIGHTING
Understand how lighting affects paint colors so you don't end up suprised
Welcome back to my evaluation of paint color series. The purpose of this series is to help evaluate paint colors BEFORE they hit the wall. We have all been on the opposite side of that scenario. We have chosen a color that we just "knew" was perfect for our space, only to waste $100 in paint and 15 hours of our time painting the room that color and end up being disappointed. Whether the shade was not quite right, or the color ended up totally different once it hit the wall, it is never fun to waste your time and money on projects that leave you discouraged.
Learning how to properly evaluate your colors can help you avoid this scenario. I cannot promise that the above story will never happen to you again, but hopefully you'll see a decrease in your painting regrets!
In the first part, we learned to evaluate the undertone of a paint. When you do this, you can better understand the type of shade that will pull through when the paint hits the wall. If you missed that post, you can catch up here.
In the second lesson, we covered evaluating your layout when choosing paint colors. Realizing that rooms are viewed together and often in the same visual lens helps you choose colors that coordinate and lend themselves to a pleasing "whole house" palate. To catch up on that lesson, simply click here.
Now in the third part of the series, we are going to cover how lighting affects color. Once you have determined your undertones and looked at your layout, you need to understand lighting and what it does to color. The most important aspect of lighting is determining what direction your home and rooms are facing. What I mean by that is knowing the position of your home on your land/lot, and then from there establishing where north, south, east, and west are. Once you know the directional position, you can determine what direction each room is situated within your home.
The purpose of determining the position of each room is that lighting is directly related to room position. The conditions of lighting in a north facing room, are quite different than the lighting that is received by a south facing room. The same goes for an east or west facing room. Therefore, colors that are painted in a north facing room might look entirely different when it is painted in south facing room. This is one reason that you can decide to paint a room "gray" and it ends up looking "blue". You can paint a room "white", and it ends up looking
"yellow". When the undertone combines with the natural light, it can enhance certain parts of the paint and bring through those undertones more strongly than you had anticipated.
COLOR ANATOMY
One more note on this before we get started. It is helpful to understand how we actually "see" color. Your eyes and your brain work as a team to actually create the colors you see. You have light receptors within your eyes that actually "grab" wavelengths and then transmit them to your brain. Objects (walls, furniture, anything!) actually all absorb or reflect these wavelengths. When an object reflects all wavelengths, then the color is white. When an object absorbs all wavelengths, then the object is black. When an object does a combination of absorption and refraction, we see color. We only see what is refracted, not what is absorbed.
Thus, no object or wall actually has color. Rather, it only has refracted light that is thrown back out and not absorbed. We only see the color thrown back (refracted wavelength of color), and then our brain processes that color to identify it. When you look at a basketball, you see orange because orange is refracted and the other colors are absorbed. You have to have light to have this refraction occur. Entering a dark room is a perfect example of this. When you enter a room without light, the room appears dark. Even though there are some brightly colored or light things in the room, they are not seen as light because there is minimal light being refracted. If the sun comes up or the lights are turned on, now our eyes receive the refracted wavelengths and our brains can process them as color.
Therefore, it is necessary for light to "bounce" in a room and refract the wavelengths of that color within the room for us to see the color that is there. When you are deciding to paint a wall, it is important to consider how much light is going to be there. Paler colors have less absorbed color and are more dependent on refraction for their purest form. Additionally, because the color is still subject to our brain processing the information, one person might see a certain shade of a color and someone else might have a slightly different opinion of the same color. Neither person is wrong, but they truly might be seeing different levels of refraction and processing them differently.
Have I confused you yet? It doesn't need to be that hard, but you need to understand how light and color work so you can utilize that in your paint selection. Hang in there.
One more thing. When we discuss lighting from this point forward, we are discussing the natural light that a room receives from the sun. Obviously, you can add artificial lighting to spaces, but that will change the tone of the room depending on the shade of lighting you choose. You need to start with the room's basic position and natural light and then move from there with paint color selection. Artificial lighting can be added later to further enhance the room's tone and feel (I will add a note to this at the end).
Let's unpack this a little bit and start with some basic ground rules for each type of room.
NORTH FACING ROOMS
North facing rooms tend to be darker, receive less natural light, and therefore tend to not "throw" the light around the room as much. This lack of light naturally means that the room will bring out cooler, less warm undertones because there is less refraction of light.
If you have a darker color in mind, they tend to do pretty well in a north facing room because the paint itself provides a lot of tone and it doesn't require as much light to "find" the color. These rooms tend to be cozy by nature and play well to enhancing that feeling with darker colors.
If you really want to paint a north facing room a lighter color (which I have been brave enough to do), then you want to remember that cooler rooms are going to bring out cooler undertones. That means if you choose a white color with a gray undertone, it is going to look much more gray and cool than it will white. If you choose a white color with a yellow or pink undertone, it will bring more warmth to the space and the color will bounce a bit more.
The room above is a north facing room and is shown painted with in Farrow and Ball's Cornforth White. This color is a favorite or mine because it is neither too warm or too cool. In a room with either warm or cool lighting, this color will still shine beautifully. It is still a light color, but has enough color pigment to pull through and refract even in a darker room.
SOUTH FACING ROOMS
South facing rooms are the darlings of decorators. They receive light throughout most of the day and have plenty of sun to bounce around the room. That means you can get away with nearly any shade in a south facing room, although if you want to paint something a lighter color, this is the room to maximize that effect.
A south facing room will still bring out undertones, so be sure to consider that with your choice. A yellow or pink undertone will read creamy and warm in a sun filled south facing room. For example, one of the decorating world's most popular white colors is Benjamin Moore's White Dove. My daughter recently painted her room this lovely, creamy white color. It reads slightly yellow due to the bright southern light that the room receives. If you select a white that has a cooler undertone, the white can read more contemporary in the space. Depending on your goal, you can select things to warm things up or cool things down.
If you have a south facing room, enjoy it. It will be a home run with a pale color and it will still live up to a dark color too. In the south facing room shown above, the color is Farrow and Ball's Skimming Stone. It has warmer grey undertones and the light just dances around in the room, making it bright and cozy.
EAST FACING ROOMS
The sun rises in the east and sets in the west. Therefore, east facing rooms will experience more sun in the morning and less sun as the day progresses. Therefore, consider the function of the room and what time of day the room will be utilized the most to help you determine what color you want to see at that time. If you are looking to retreat to the room toward the end of the day, then plan for the darker lighting that will be there at that time. If the room is a bedroom and you want to greet the day in a lighter environment, then look to capitalize on the early sun and go with a lighter color that will be brighter in the morning.
As as undertones run, east facing rooms are often felt to provide a cooler undertone, so choosing colors that have cooler undertones will likely enhance the color of the room. For example, if you paint an east facing room with a yellow undertone beige, it is likely to turn out a bit different than it looks on the paint chip. If you chose a similar beige with a green undertone, which is a cooler color, then you will likely see a color that shines truer when it hits the wall. That is not to say you cannot choose a warm undertone for the color in an east facing room, but understand that it will likely have more shift on the wall from what you might expect.
As mentioned, the time of day will matter too. In the morning, east facing rooms will have more warmth due to sunlight, and they will fade to cooler as the day progresses. Keep this in mind when choosing color samples.
The office room shown above is an east facing room. It is painted in Farrow and Ball's Strong White. This color is a cooler gray white, which was just beautiful in this room. In the morning, the walls look nearly white with a cool gray undertone. As the day progresses, the gray gradually deepens and starts to peek through. I was initially thinking that I would paint this room a more pure white, but I am glad that I chose a cooler undertone to work with.
WEST FACING ROOMS
As expected, west facing rooms will behave nearly opposite of east facing rooms. Because they won't receive as much sun in the morning, they will read as cooler spaces at that time. As the day progresses, they will gradually receive more sunlight and therefore, they will steadily warm up. The paint colors that have warmer undertones will often shine in these rooms as most of the afternoon they are receiving sun. The warmth doesn't translate as well in the morning.
As with east facing rooms, west facing rooms can handle both light and dark shades, but remember they will experience more dramatic light shifting throughout the day than a north or south facing room.
In the west facing bedroom above, I chose Gray Owl by Benjamin Moore. Gray Owl is still considered a cooler color and I wanted this room to read gray once the paint hit the wall. The morning, the room feels very gray. In the afternoon, the room has a lighter gray feel when the sun hits the room. Keeping the undertone cool in this room was the key to making the room stay gray.
USING YOUR PAINT CHIP FOR 24 HOURS
With these basic ground rules, you can start to evaluate your color selection with a little more clarity. One thing I make sure to do is to leave my paint chip in a given room for an entire day. I check the chip in the morning, afternoon and evening. Each time, I put the chip on the wall, walk around the room with it, and look at it against my trim. If at any point in the day I don't care for the tone of the color, I move on to my next chip. Once I find the color that seems to please my sight all day, I know I am moving in the right direction.
SPECIAL CIRCUMSTANCES
There are also a few special circumstances regarding lighting that I wanted to discuss during this post to help further your understanding when making color choices regarding lighting.
ARTIFICIAL LIGHTING
Most rooms contain some form of artificial lighting. The type of bulb chosen will determine the shade of light that is cast. That shade of light can either enhance or detract from the paint color, depending on (you guessed it), then undertone of the paint.
Incandescent lighting (which is what most of us consider a normal light bulb) as well as halogen light bulbs (often seen in recessed lighting or can lighting) tend to provide a yellow undertone in the lighting and therefore will enhance lighting that also has a warm undertone.
LED or florescent lighting usually reads cooler due to its cool undertone. Therefore, it tends to do better with colors that have cooler undertones.
When you put warm lighting in cool spaces, things often start reading as "awkward" in the space. Those undertones fight and start to compete, which ends up being visually distracting and the color on the wall feels "off". It is better to support colors with like colors. You can usually see the undertone of the light bulb noted on the box of whatever bulb you are considering, which should help you with the selection (white light, cool light, blue light, warm light, etc.) At the end of the day, you can do what you want with artificial lighting, but spaces are further enhanced with thoughtful selection of artificial lighting.
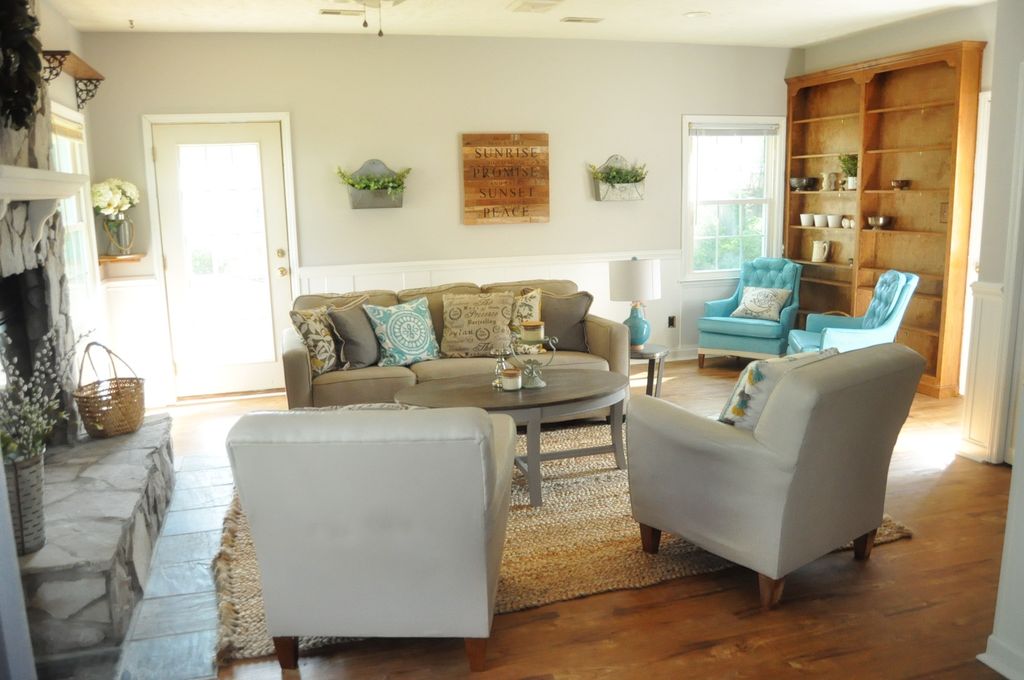
In the room above, the warmth of the wood and the warmth of the paint color (Linen White by Benjamin Moore) all work together with the incandescent lighting from the fixture. Linen white has a yellow undertone, which pulls warmth from the floors and cabinets, and then works with the lighting as well. Everything balances and the warm undertones unite to create a cozy environment of warmth.
ROOMS WITH NO NATURAL LIGHT
Although most rooms have some form of natural light, some rooms don't have any windows or doors at all, and are therefore limited in the natural light they receive. When this is the case, there is no source of natural light so refraction becomes more difficult. Sometimes these rooms are open enough to receive light from adjacent rooms, but even if they do, the light will be more limited. Limited light means less refraction and more difficulty "seeing" lighter shades. Other times, these rooms truly have no natural light. An example of that type of room might be a bathroom or closet. When a room receives no natural light, paint struggles a bit because refraction is reduced.
Remember, for paint to truly show its natural color, it has to "bounce" light throughout the room. The color pigment essentially reflects the light it receives and then provides the hue that our eyes and brain for processing. When light is limited, the bouncing effect is substantially reduced and the color has trouble being thrown. As a result, the depth of the color is reduced.
Because of this fact, pale colors are very difficult a room with no natural light. Paler tones contain less pigment and also don't have the chance to throw the pigment they do have to bounce for refraction. Thus, it is harder for them to "show" their true color. If you have a small room with no light, it can be really fun to choose a darker hue that will ring truer than a lighter hue, simply due to the fact that it has more pigment. That stated, I have successfully used lighter colors in these naturally darker spaces. What I have done to compensate is utilize artificial lighting to match the undertone of my paint and essential "amplify" the color's throw/bounce ability. Another secret is to include a mirror (which are often already in a bathroom that might be limited with light). This technique works because mirror reflects, and offers another way for the color to bounce. In the end, any color can work, but you need to be more strategic with some!
In the dining room above, there were some tricks that I used to help with color selection. Originally, this room had no openings to other rooms. There were doors on all sides and the room was very dark.
The first thing I did was remove the doors to allow some natural light to filter in from adjacent rooms. Next I chose a deeply hued paint color (Farrow and Ball's Mole's Breath) for the trim and chair rail, and we added the wainscoting for interest. I wanted a pale color on the top (as you can see, I broke all rules about rooms without good natural lighting and wanted white). I figured that my white choice on top would be helped out by the deeper color below. I also chose a semigloss paint (Perfect White by Valspar), which I typically don't suggest for walls, but the gloss has more shine in it and I figured that would help throw the color around (we will discuss what sheen to use and where in a future color series post). Finally, I changed out the light fixture, which doubled the light in the room. All in all, the room turned out great and I used lots of smaller tricks to achieve the look I wanted in a difficult space.
“Color is my day-long obsession, joy and torment.”
This quote by Mr. Monet can sum up how difficult color selection can be. We can find ourselves deeply moved by a color, so excited to put it up on the wall, only to find that the same color ends up being a thorn in our side just a short time later. You and friend might look at the same color and disagree about how it looks, simply because you are processing it differently. Needless to say, it is more complicated than it seems like it should be!
Finding the right color will make your home the best place for you, so taking the time to look at it throughout the day and considering the natural lighting is one of the most important things you can do to ensure you are pleased with your selection once it hits the wall. These are just guidelines; you'll have to look at your own space and determine what works best for you; hopefully they should at least save you time, money, and energy in the process!
Have you ever been surprised by how lighting changed the paint color in your room? Was it a pleasant surprise? Have you argued over a color shade with a spouse or friend? Did I miss anything? What have you learned about the lighting in your house? Has it changed your paint selection? I'd love to know!
- Casey
HOUSE HUNTING FOR HISTORIC HOMES
Things to consider when house hunting for a historic home
Do you ever dream of fixing up an older home with lots of character? I dream about it all the time. My friend told me that she "thinks I have a problem" or "might be addicted to houses". She is probably right, but none the less, I continue to seek them out. There is something about the idea of taking something that is rough and a little run down, and restoring it to its original beauty.
So, my obsession continued and I went to look at this house with my realtor.
Isn't it classic? Built in 1947 and essentially untouched since then. There were so many features that I loved. The part I loved inside the home immediately was the foyer and the stairwell. I could not pass up the details!!
Though these pictures don't show it, the ceiling above the stairwell is curved and just beautiful. I love the solid wood trim, large steps and gorgeous windows above the door. Did you note the heat register near the door? This is upgraded from Radiant heat, but it is not central heating and air. There is no central air in this house....which is about 30-40K to install, depending on the details of the systems. Ouch.
This dining room was beautiful and elegant. I loved the large wainscoting and lovely light coming in the room! This dining room does back into the kitchen on the left, so I always contemplate opening up that wall. That can be really fun, but also really expensive, and when you start opening up walls that are nearly 100 years old, you can really find yourself some issues. While I do like open concept, there is also something nice about keeping the integrity of the home and the rooms as themselves. It is also a LOOOOTTT cheaper.
Ahh the kitchen!! This is a 1940's charmer. My mom said this brought back memories of her childhood and that was sweet to hear. It obviously would be overhauled, but you have to love that it was maintained since the 40's. How about that light filled window over the sink? Charming.
This living room is beautiful! Love the fireplace and awesome sun porch right off the wings. I would loose the mirror over the mantel, but otherwise just some sanding and floor refinishing (through the entire house), needs to happen. That has a price tag of about 5-6k for that many square feet.
This is one of three baths and they were all vintage fun. Love the floor tile (would leave that), but the wall tile might be swapped, or possibly left depending. I keep original iron tubs. They are amazing quality and can usually be re-glazed and end up looking nearly new!
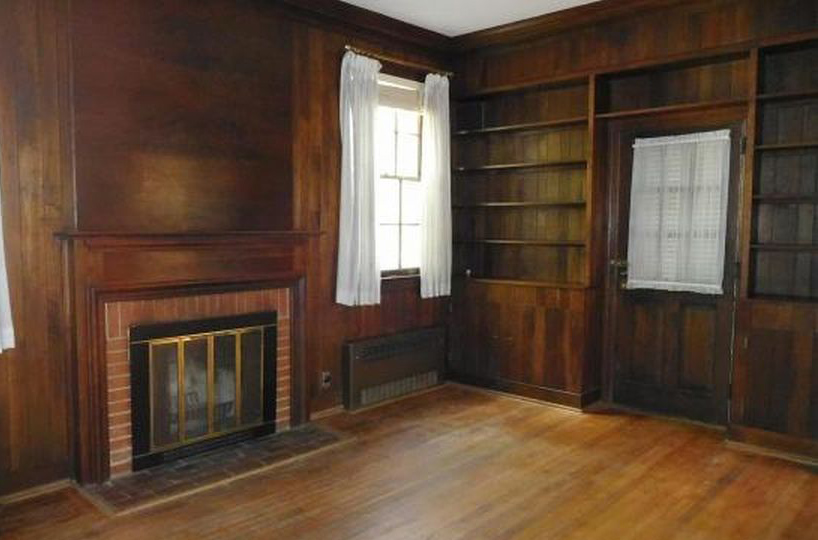
This is the den. This paneling on the walls is wood....like actually wood. The stuff is nearly an inch thick and is really solid. Though it is very functional (and hides stains like a dream!), it does make the room really dark. That stated, this is paneling that is actually the wall. You don't just "take it down" like paneling that is put up over drywall. This wood wall IS the wall. If you take it down, you have to sheet rock walls back up. That adds up quick too. So, jury would be out on this one.....
Pretty awesome attic. I love the attic fan. It's huge and still works. When you turn it on, it pulls air through the entire house and circulates air through it. Pretty amazing. Also, pretty dangerous. You have to be careful with these as they are huge, metal, and exposed. Kids would need to be cautioned. I love the wood ceilings in this attic. It feels like a storybook up there!!
Pretty amazing walkway from the house to the garage (which was a later addition to the home I am sure). This was probably my favorite part of the house. I loved the quality of the work and the amazing detail. Just a gorgeous design and so well thought out.
Here's another view. Just beautiful!
So at the end of the day, we did not make an offer on this house. I did not show you the four bedrooms, which were lovely and all had decent closets. There was also a room off the kitchen, a brick patio in the back, a two car garage (very rare find in our neighborhood), and even a great over-sized walk out basement (also super rare in the South!). The roof was asbestos tile, which can actually last 40-80 years, but is more costly than a regular roof to place because of asbestos abatement that has to happen.
Mostly, we passed because the house is on a busy street and we did not want to be on that street, even if we could get the house at a price we could work with. We are not afraid of repairs, but you cannot change locations. We want our four young kids to be able to have a little more freedom; too much traffic and chaos would be stressful for us.
It's hard to look at homes that I know I could fall in love with, but my husband keeps me straight and focused. The right house will come along, but for now, we stay put.
Have you considered a whole house renovation? Have you completed one?
-Casey
FOUNDATIONS - The "F" Word FOR HOMEOWNERS
Remaining calm when the bottom is literally falling out.
Foundations. This might be the "F" word of homeownership. Nothing strikes up Fear, Frustration, and other words that I will not mention (but absolutely know that you can envision where I am going with that). No one wants to hear that they have a foundation problem. I know I didn't when I realized we had one. I had slowly watched some cracks develop in our house. We had even hired them to be fixed, and they were, but they rather quickly reappeared. This work was completed by contractors that I know and trust. I had a gut feeling that there were bigger problems lying below. We had just recently re-flashed our chimney and added a new roof to our front porch. A few days ago, I was getting the kids off to school and I turned around only to see what I had feared. There was a large crack in the chimney. The Chimney was separating itself from our house. Inside, it was pulling the wall with it. Not good. Immediately, I found myself immersed in a series of "F" words; I turned to fear, frenzy, and frustration. I was scared. I did not know where to start, the costs involved, who to trust, and more. I had forgotten another "F" word for foundations - FIXABLE.
Yup. Like anything else that breaks down in a home, foundations are fixable. When I unpacked all those "F" words, I realized that at the core of all my fear was the fact that I did not know enough about the problem to find peace with the solution. Many times, homeowners fear what they do not know. I find that the more I understand and analyze the issue, the more comfortable I become with the problem. The more comfortable I am with the problem, the less fear there is. Once the fear has subsided, I am able to gain clarity and work to problem solve the issue. When I have a plan, I am much more calm, objective, and able to handle fixing the problem.
Why do foundation problems scare us? I suppose is the idea that the house is going to crumble and fall down around us, or the idea that we are going to have to go bankrupt fixing it. Insurance companies (with minor exceptions) don't include the foundation in a homeowner's plan because the scope of repairs can be costly. I would add that it is the fear of the unknown that also increases the scare factor. Let's look at these fears.
Fear #1: The house will fall
Okay, it would be scary if your house completely fell down all around you. No one would be okay with that. However, in most cases, your foundation has signs of warnings or issues far before the entire structure is shot and your house instantly crumbles to the ground. Usually, the entire foundation does not fail all together, but rather parts of it become compromised. There are several reasons the compromise can happen. Here are some major and more common reasons the foundation might fail:
- Soil Shifting - contraction and expansion/recoil of the soil changes the pressure on the foundation and slowly causes movement
- Highly wet/dry regions can shift the soil quality and change the pressure against the foundation.
- Time - nothing lasts forever. Sometimes things just give out
- Poor Worksmanship - hate to mention this one, but not everyone does good work. validating a contractor and company is very important with structural work.
- Natural Disasters - floods, earthquakes, tornados - all can change the landscape and structural integrity of the foundation
- Water flow against the house - can alter the masonry and positioning of the foundation
interior wall crack and mantel pulling from the wall
Fear #2: Cost
We all freak out when things are expensive, especially when those things are not things we want to spend money on. Spending 10K on a foundation repair is a lot less satisfying than a new kitchen remodel. Definitely does not give you the "wow" factor when the work is hidden. However, structural problems are things that cannot be ignored. While the first fear of the house falling down is unlikely, if you let things go, then eventually things will start to crumble...not good.
The good news is that a foundation does not usually fail all at once. Typically, there are portions that require your attention and reinforcement to improve their function and stability. These portions are often stabilized by "push piers" that are drilled down to the bedrock surface inside the soil. From that stable surface, they push back up under your foundation to reinforce your existing structure and prevent further compromise to the stability of your foundation. In North Carolina, each pier that is required is roughly $1200. The amount of piers required is based upon your current structure, length, and size, which is calculated by state law and code requirements. While this is not cheap, it is also better than 40k to lift your entire house and replace your entire foundation. While that can happen from time to time, it is usually not the typical repair.
fireplace mantel pulling from the wall
Fear #3: The Unknown
I will be the first to admit, I am not an expert in the world of foundations. In fact, I used to know very little. This fear of the unknown is possibly the worst fear of all because we feel overwhelmed by where to begin. Let me help you with that:
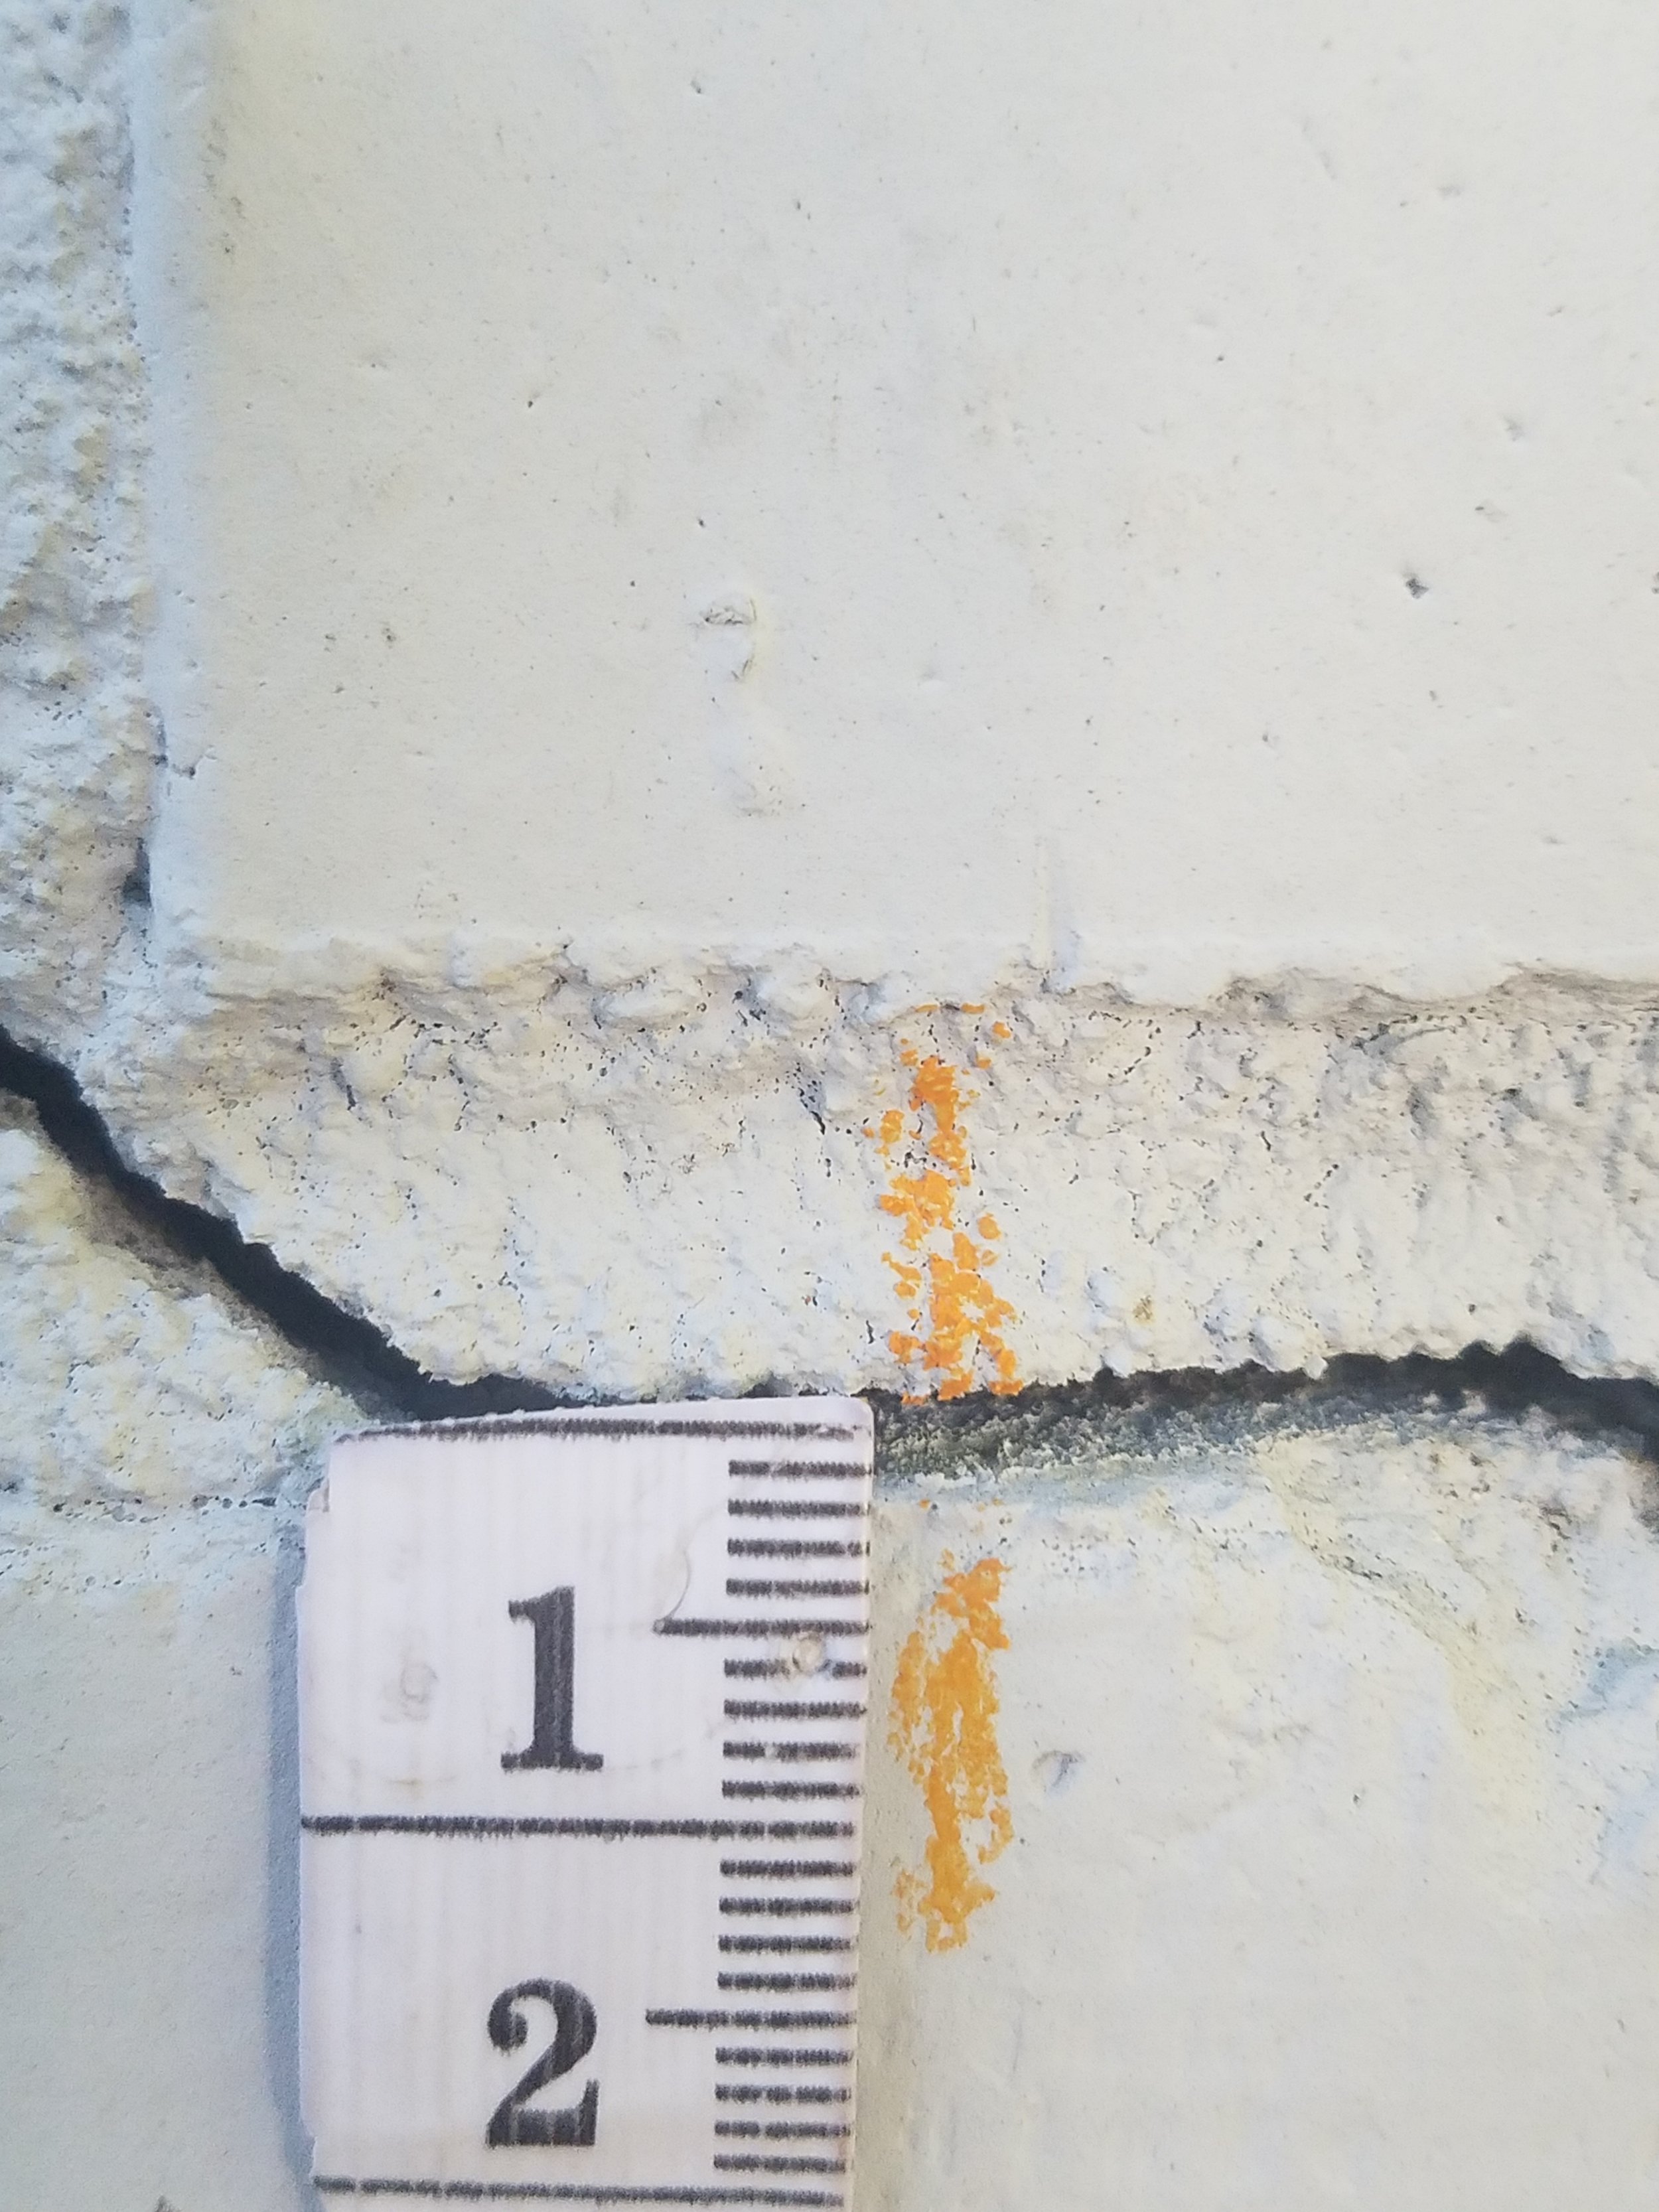
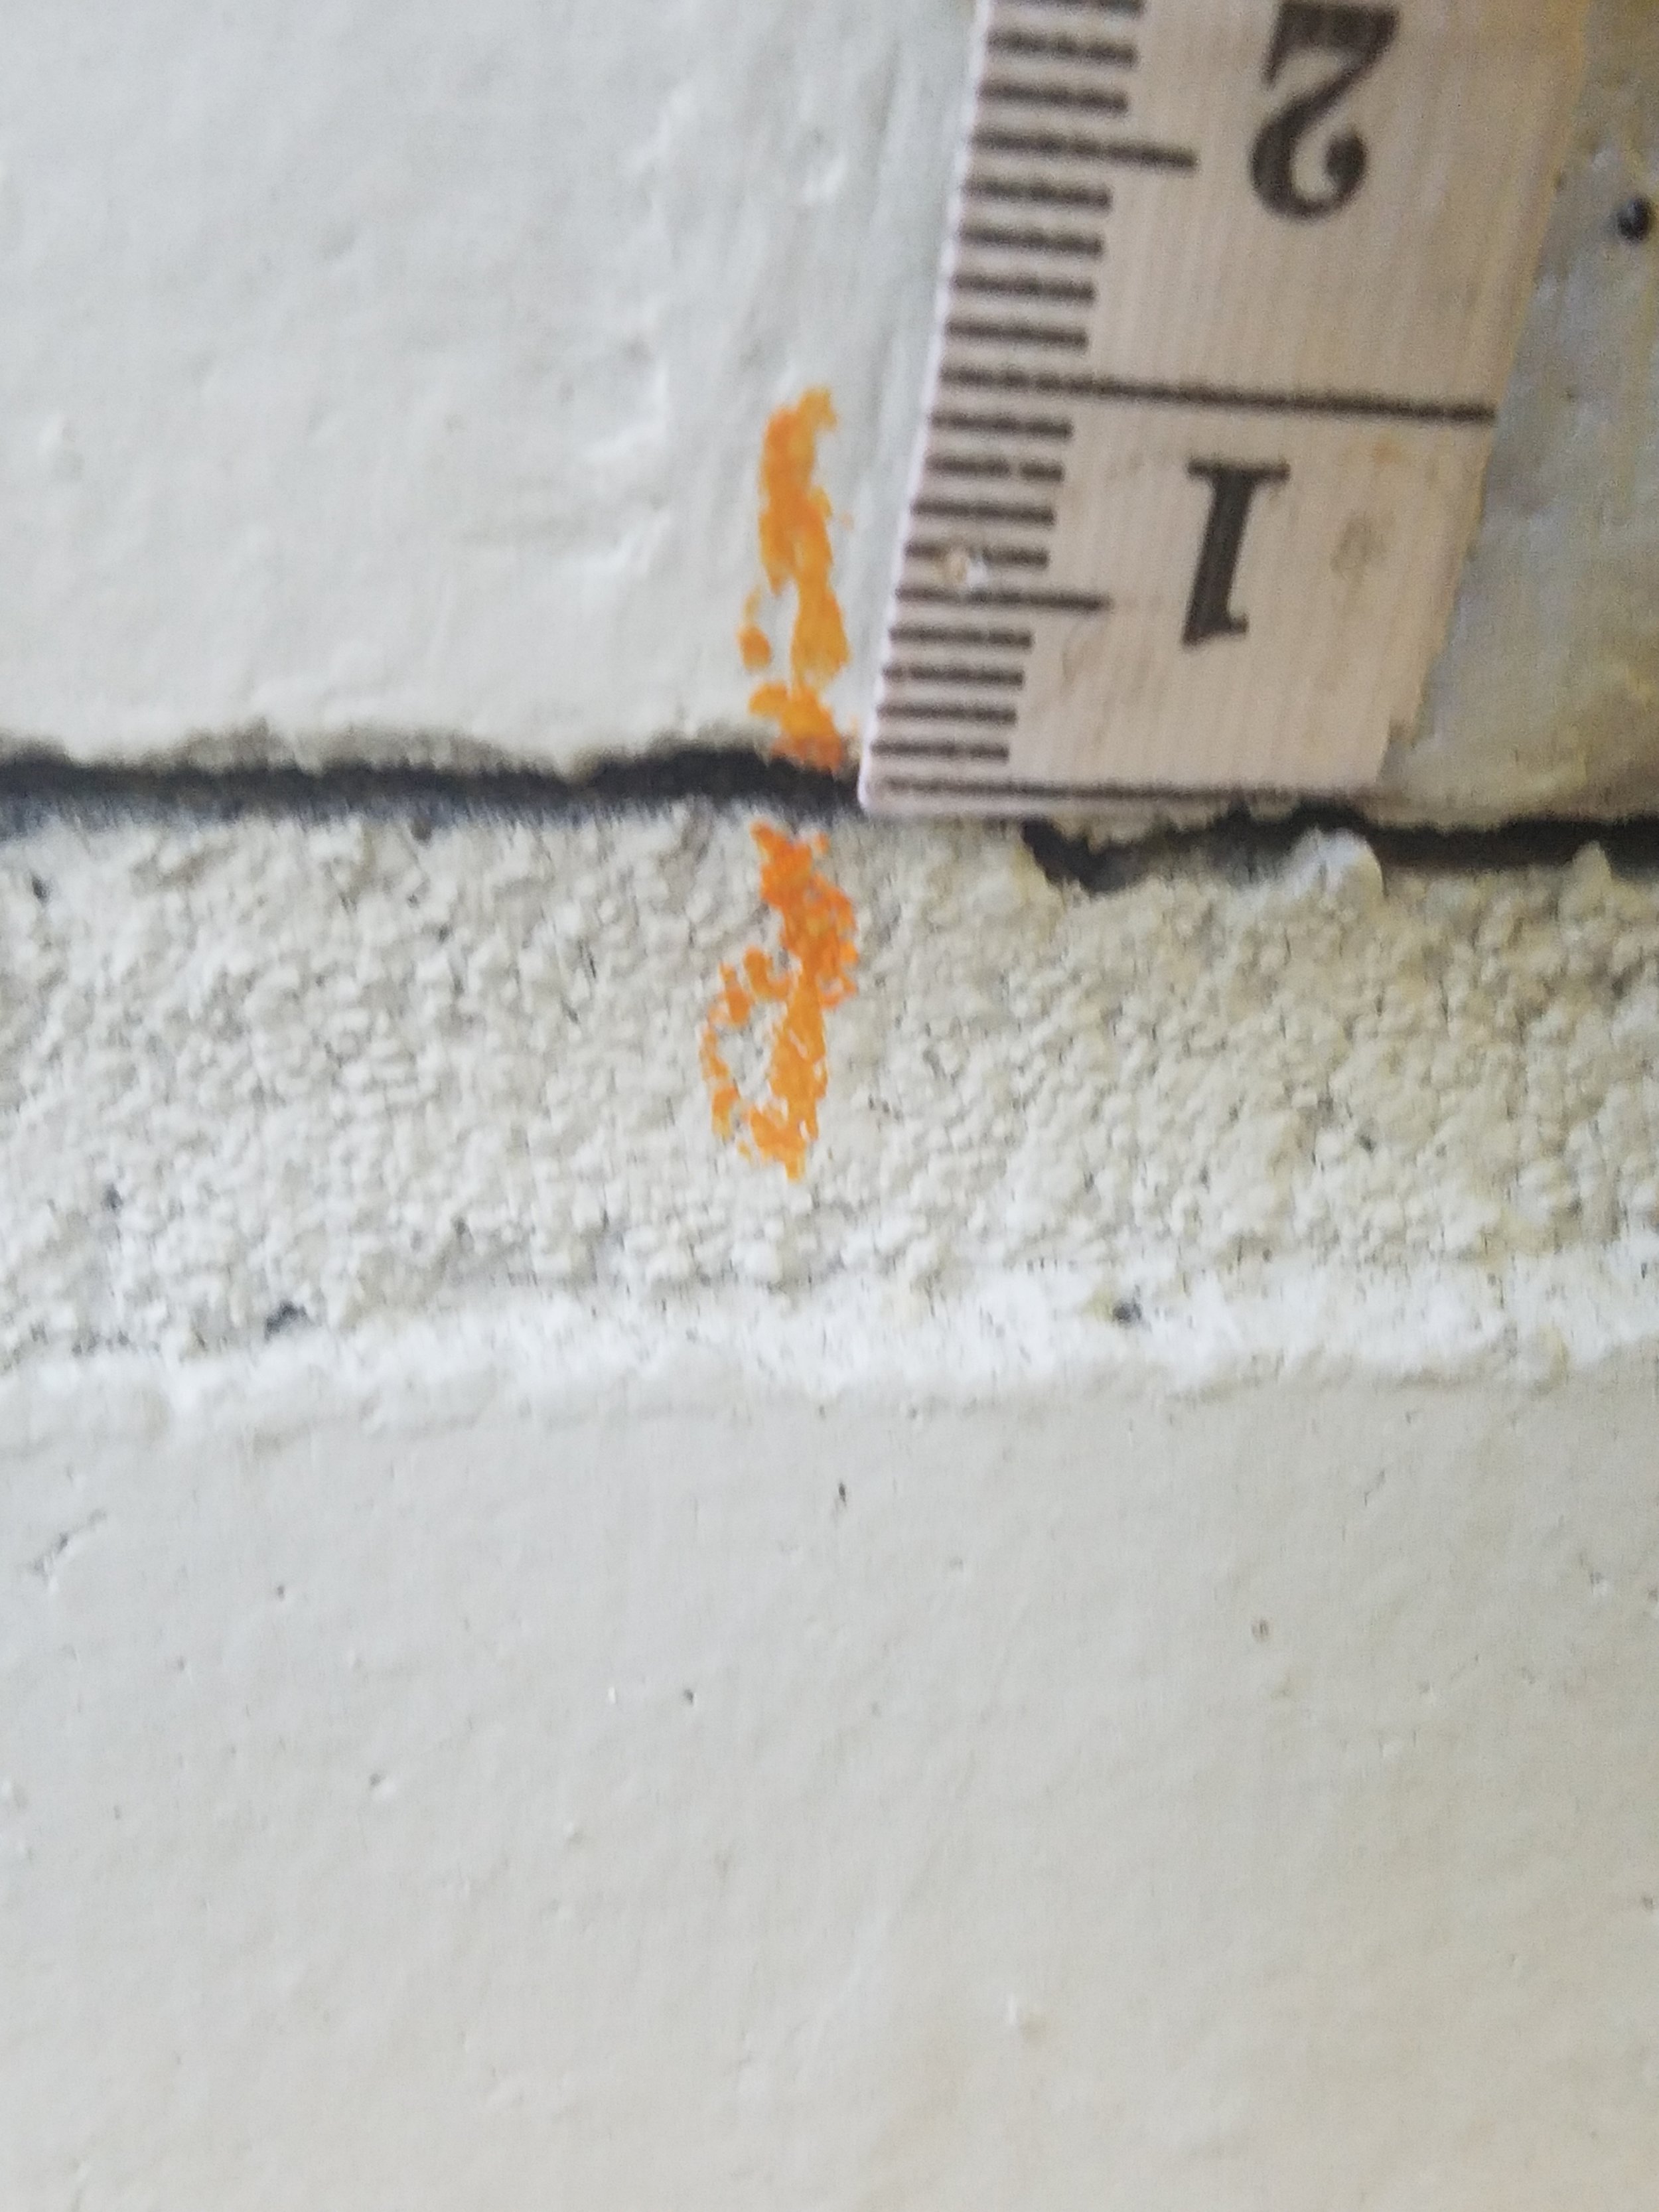
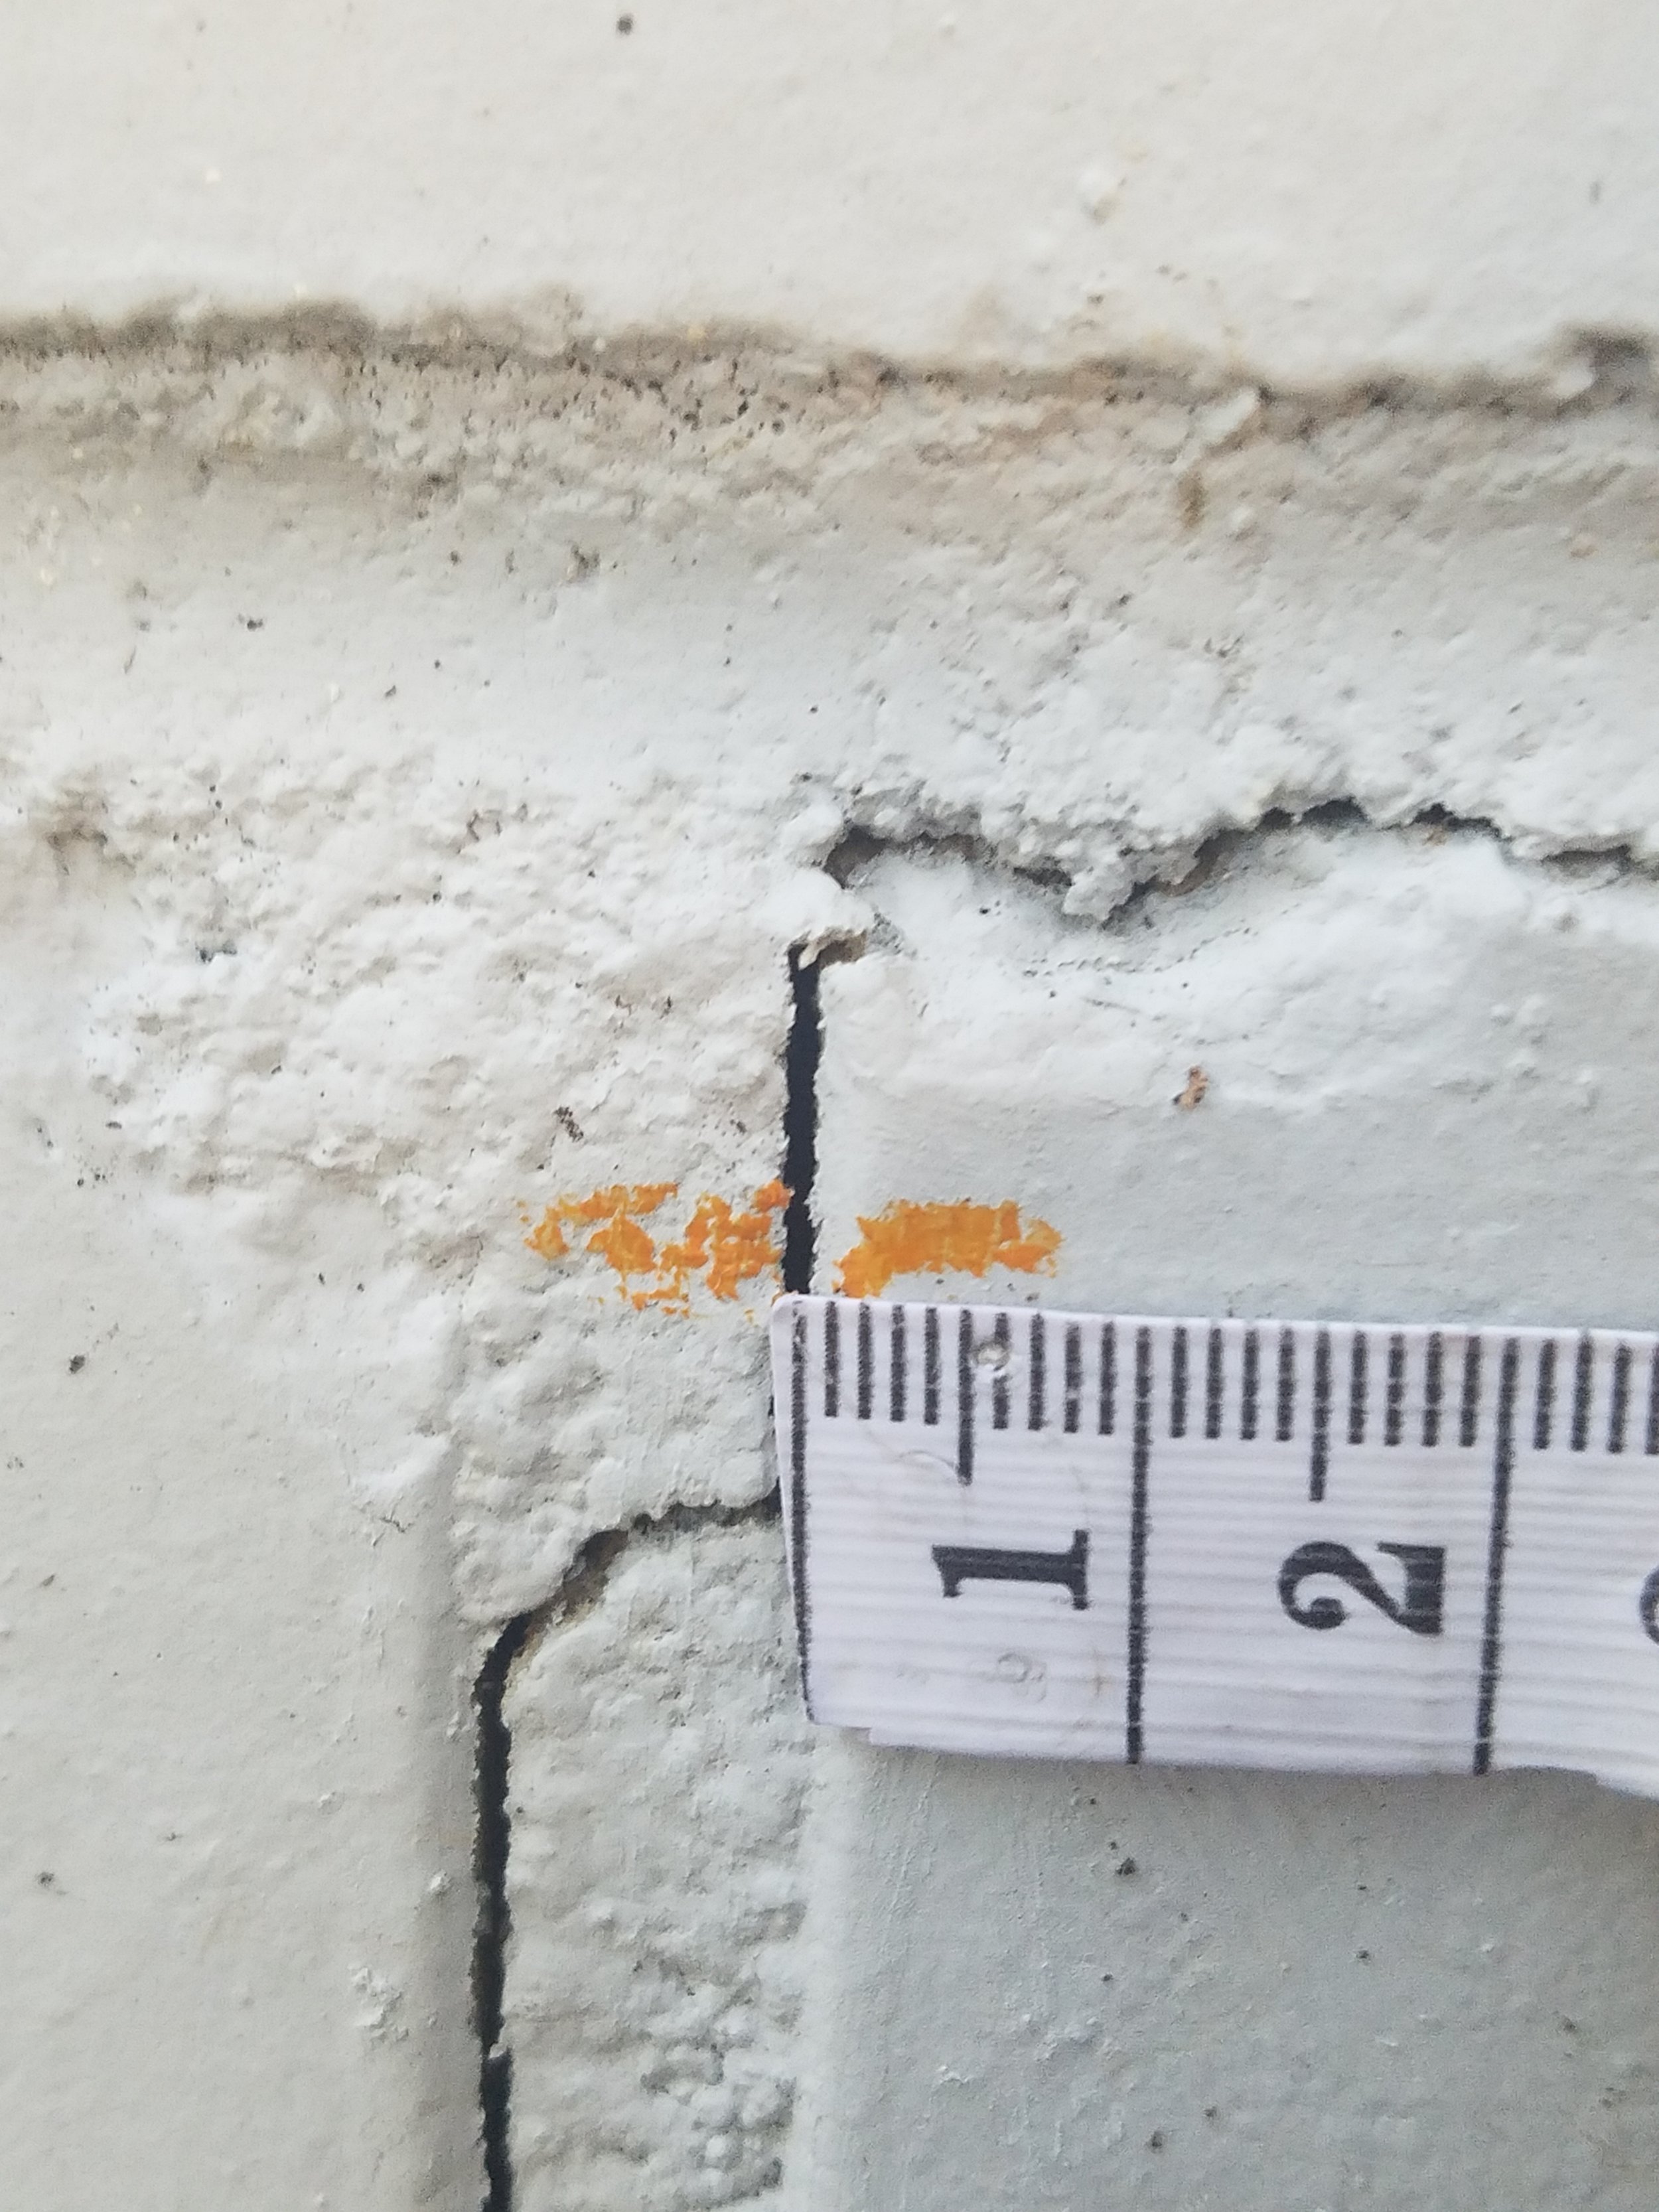
- Step 1: Identify the problem - Look for cracks in your foundation and bricks. Large cracks are often seen going along the mortar and are called step cracks. If you see cracks, measure them. Note a spot on the wall where you are measuring and mark it with a crayon (wax based). This will help you identify where you made the mark so you can consistently measure the crack. Measure it once/week and note any changes. You might see the crack enlarge or shrink with rain and dry seasons, or you might see it steadily increasing. Monitor this. You can also buy foundation crack monitors that sit inside the crack and help keep up with measurements for you. If you see the crack progressing, you might have a problem
- Step 2: Consult a Structural Engineer - Once you believe you have an issue, contact a structural Engineer that you can trust to evaluate your problem. Ask for recommendations from Architects and contractors you trust. Finding a good engineer will be important so they can survey your site and provide recommendations for repair. Having this done will cost around $500, but you will need to have this completed as most states require this prior to any foundation repairs being completed.
- Step 3: Gather your Estimates - Ask your trusted structural engineer for recommendations regarding repair companies. Trust these recommendations. There are lots of companies out there that are willing to do work, but that does not mean they will do it well. You want only the best people to do this type of work. Once you have your list, contact at least three companies to provide you with estimates for repair. You want "apples to apples" comparisons so you can correctly see what price differences are for the same work. Use your engineering report to instruct the contractors in what work you want completed. Because you already have an outline regarding what work NEEDS to be completed (from the engineer), you will avoid being "oversold" by any of the companies (aka, them telling you that you need something that you don't. Information reduces that fear). Ask about their warranty. That needs to be part of your evaluation of the work. Some companies will offer a 5 year warranty, and others up to a 75 year. Ask if the warranty is transferrable to a new owner if you sell your home; you want to know what you are buying
trim separation
- Step 4: Barter. Yup. You now have three estimates and you know what work needs to be done. Let's pretend you trust one company more, but their price is higher than another, or they offer a shorter warranty. Work with the people you trust and ask for them to price match or warranty match the competition. The worst they can say is "no." Also ask if there is a discount for paying up front in cash if this is an option for you. It might save you 10%. If your estimate is 10K, then you'd save $1,000. That's not bad.
- Step 5: Repair That Foundation - "suck it up, buttercup". I know, not cool, but that is what needs to happen. Again, you need to decide that you have to stop caring about it being expensive, and just get it done. You will feel better in the long run if you stop worrying about it.
- Step 6: Document - that is something that should be done along the way, but be sure to keep the engineering report, repair procedure, and receipts from all this work. When it comes time to sell your home, there might be concerns with foundation integrity. Having these documents in hand can actually help promote the sale, especially when you might be able to say there is a 75 year warranty on the work.
ceiling crack
So, you might wonder where that leaves us. Well, we are having the chimney repaired for sure. That will be about 2-3K. As for the other cracks in the side of the house, we are monitoring them for now as we don't see as much movement inside the house on those. If they progress in the next six months, then we will have to throw another 8K on that. At least we have some time to prepare. More than anything, we know what we have on our hands. Our home is lovely, but the bones underneath need to be strong. It's kind of like a super model with osteoporosis. She is only going to look good for so long...if the bones underneath break, it's all over :) Better to be informed so the issues can be solved, then to run around with all the "F words" that come to mind. Most things are fixable. This is too.
Have you had to fix your foundation? What was your experience?
- Casey


